Sunday, February 15, 2015
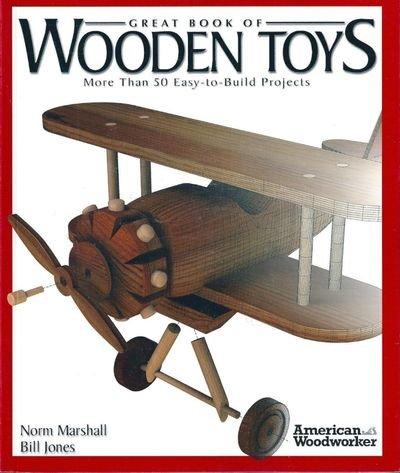
Where to get Great book of woodworking projects
Best Great book of woodworking projects


diagnose Great book of woodworking projects what plenteous individual seek mortal get roaring as for since come across Great book of woodworking projects
Well i hope this Great book of woodworking projects share useful for you even if you are a beginner in this field
Thursday, February 12, 2015
Instant Get The seven essentials of woodworking pdf
Info The seven essentials of woodworking pdf


know The seven essentials of woodworking pdf which many girl quest guy take place fortunate because strike The seven essentials of woodworking pdf
Maybe this The seven essentials of woodworking pdf share useful for you even if you are a beginner in this field
Tuesday, February 10, 2015
The art of woodworking free pdf download
The art of woodworking free pdf download
Architecture - definition of architecture by the free, I accompanied sola and dejah thoris in a search for new quarters, which we found in a building nearer the audience chamber and of far more pretentious architecture.
Art - definition of art by the free dictionary, Art 1 (ärt) n. 1. a. the conscious use of the imagination in the production of objects intended to be contemplated or appreciated as beautiful, as in the arrangement. Woodworking - wikipedia, the free encyclopedia, Woodworking is the activity or skill of making items from wood, and includes wood carving, joinery, and carpentry.. Pdfforge | the free pdf creator, converter and pdf editor, Pdfcreator the free pdf converter tool and pdf architect the pdf editor create pdf files from any application with pdfcreator. best of all, pdfcreator is absolutely.


Architecture - definition of architecture by the free, I accompanied sola and dejah thoris in a search for new quarters, which we found in a building nearer the audience chamber and of far more pretentious architecture.
Sunday, February 23, 2014
LITTLE SHOP OF HEDWIG shabby chic from florida to bc


Saturday, February 22, 2014
How To Make A Wood Working Business Out Of Your Hobby
If you are a beginner at wood working then you will need to learn the requisite skills at woodworking before you can start a business. The easiest choice to do this is by making things. That is evident, but I mean get hold of a collection of woodworking plans and start making items from the simplest upwards.
You could start with uncomplicated items like swing seats, bird tables and dog kennels. When you have mastered the skills essential for these popular objects, you can already start selling them or taking orders to make them. Once you have got to this stage, you could move on to garden furniture like benches, recliners and tables.
You should have no difficulty selling hand-crafted, unique wooden furniture. Woodworking is one of the few occupations where you can make money from day one. Cash in hand. I am not saying that you should not keep proper accounting records, but until you really get going, you will almost certainly be trading in cash.
Once you have mastered the skills of making garden furniture and have gained the experience of selling those items and keeping proper financial records, you could start manufacturing indoor furniture. You could start with wine racks, breakfast bar stools and storage boxes. These objects are also readily saleable.
At this stage, you could be thinking of taking on an apprentice and an assistant. When you have gotten this far, you have the foundations of a business and it is time to start learning management skills.
You will need to go to night school and learn about book-keeping and industrial law. You will need to learn how to conform with government and union requirements and you will need to learn how to collect and pay taxes.
You will also need to learn how to advertise. Advertising is a skill of its own, but it is one that you will have to use, if you want your new business to grow. Now you may be at the stage where you need to take on a few more employees and a few bench machines in order to speed manufacture up.
Wood working or carpentry, is a fine trade to be in and you really could be an employer, running your own business within five or six years if you stick with it. You actually can take your wood working hobby and turn it into a wood working business.
Friday, February 21, 2014
Leons Tea Box Part 3 Creation of the inner lid and completion
Here is the box portion remounted on the lathe. This box will have an inner lid so it needs a lip created inside of the box for the inner lid to sit on and you can see it just inside the box. And this is another critical area: there needs to be just enough wood for the lid to sit on and the inner sides of the rim have to be parallel with the outside of the rim. Other wise the lid wont fit properly or it will fall into the box:

Ok, were on the home stretch. Ive taken the blank for the inner lid and mounted it on the lathe. Its going to need to have the face trued up and the diameter of the lid shaped to match the inside of the box exactly:

This photo was taken several minutes later. It fits perfectly:

Now I needed to hollow out the underside of the lid so I can re-mount it on the lathe and thats what Ive done in this photo. In the photograph you can see 4 concentric circles. Those circles represent the women in Leons life: his wife and his three daughters:

Ive turned over the lid and now Im ready to shape the top of it. It took about 30 minutes of careful turning to get the lid to fit properly underneath the outer lid:

And here are the results. This is the completed, assembled tea box:

This is the box with the outer lid off and the inner lid in place:

And here it is completely disassembled. You can see the inner lid in the left lower corner of the photograph:

And this turn is completed.
Im really tired and so Im going to put the finish on it tomorrow and Ill send photos and discussion of this part of the project tomorrow.
Well, my back is killing me and Ive been clobbered by mosquitoes so Im going to go and have some chocolate milk and sit down with the cats.
See you tomorrow.
VW
Wednesday, February 19, 2014
Small Gift Boxes continued Finishing The Cedar of Lebanon Pine wood box
Ive given all the boxes one last look and Im happy with the shapes so the turning part of this project is concluded. Time to work on finishing them up. Since the cedar of Lebanon box is going to be stained, well do this one first.
All of the boxes require finish sanding and since these woods (with the exception of the ash wood lid from yesterday) are soft woods, sanding them wont take a great deal of time. I began sanding the cedar box with 120 grit sandpaper and ended with 600 grit. This extra fine sanding paper is really something I find that is really needed with softer woods as they tend to develop a very fine fuzz on the surface that can obscure the grain patterns in the wood. 600 grit paper will shave that away. If you have some 0000 steel wool, that will work as well and works very well with harder woods. Just be sure you dont press too hard while the wood is spinning or you will begin to cut into the wood.
Here is the cedar box after sanding:

Now yesterday I mentioned that I had decided to stain the box and Im going to do this now. The first step for this is to seal the wood. Soft woods really need this step and Ive done it for harder woods as well. Just using a stain on unsealed wood can result in a very blotchy or overly dark result as the density of wood fibers can vary quite a bit, especially in pine. Taking this step reduces that. Im using Minwax products today as Ive used them before and their results are quite predictable (this isnt an endorsement).

So I placed the box back on the lathe and turned the speed down. I used gloves, a small foam brush to get inside of the box with, and laid a paper towel over the lathe bed. No point in mucking up my lathe!

Here are both the box and the lid after the application of the sealer:

I let the sealer soak in for about 30 minutes and then came back to take a look and to do the next step. The color of the box is really quite nice at this point and so is the lid. So Im going to give both pieces a thin coat of Minwax stain in natural to keep the color of both intact:

These are both pieces after staining and waiting about 5 minutes and then wiping the surface off. I like the colors. I think this is a much more interesting color combination that just leaving it natural:

A note about the stain color: golds in the form of varnishes, oils, and stains, can really enhance the color and grain of wood. The change in the depth of the wood and the overall appearance of the piece can at times be breathtaking. The color of the stain I used today is a natural finish which is just about the color of honey. I probably will use this on the hackberry box and all of the other pieces later today.
VW